maven的安装 maven下载地址:maven官网
下载后解压到一个固定位置,比如我这里直接解压到:/Users/yiny/soft/apache-maven-3.8.1
然后更改.bash_profile (如果使用zsh的话需要修改.zshrc),将maven的环境变量添加进去:
1
2
export M2_HOME="/Users/yiny/soft/apache-maven-3.8.1" export PATH="$M2_HOME /bin:$PATH "
然后在命令行执行mvn -v,如果命令成功返回显示了maven的版本号,就说明maven已经安装成功了。
修改maven的默认配置 修改本地仓库地址 安装成功后,需要到maven的安装目录下的conf/setting.xml文件中修改一下默认的repository存储位置和下载镜像。
1 2 3 4 5 6 7 <localRepository > /Users/yiny/soft/apache-maven-3.8.1/repo</localRepository >
修改localRepository节点的值,配置本地仓库存储地址。
修改镜像地址 还需要配置下载源为阿里源,提高下载速度,在mirrors节点下添加如下mirror配置:
1 2 3 4 5 6 7 8 9 10 <mirrors > ... <mirror > <id > nexus-aliyun</id > <mirrorOf > central</mirrorOf > <name > Nexus aliyun</name > <url > http://maven.aliyun.com/nexus/content/groups/public</url > </mirror > </mirrors >
创建maven工程 这里以java的jar格式工程说明mvn的工程目录结构:
1
2
3
4
5
6
7
8
9
10
11
12
13
14
15
16
17
18
19
20
21
22
23
24
25
➜ mvntest1 tree . ├── pom.xml ├── src │ ├── main │ │ ├── java │ │ │ └── cn │ │ │ └── geekhall │ │ │ └── main │ │ │ └── Main.java │ │ └── resourses │ └── test │ └── java └── target ├── classes │ └── cn │ └── geekhall │ └── main │ └── Main.class └── maven-status └── maven-compiler-plugin └── compile └── default-compile ├── createdFiles.lst └── inputFiles.lst
然后在pom.xml文件中添加如下内容:
1
2
3
4
5
6
7
8
9
10
11
12
13
14
15
16
17
18
19
20
21
22
23
<?xml version="1.0" encoding="UTF-8" ?> <project xmlns ="http://maven.apache.org/POM/4.0.0" xmlns:xsi ="http://www.w3.org/2001/XMLSchema-instance" xsi:schemaLocation ="http://maven.apache.org/POM/4.0.0 http://maven.apache.org/xsd/maven-4.0.0.xsd" > <modelVersion > 4.0.0</modelVersion > <groupId > cn.geekhall</groupId > <artifactId > maventest1</artifactId > <version > 1.0-SNAPSHOT</version > <properties > <junit.version > 4.11</junit.version > </properties > <dependencies > <dependency > <groupId > junit</groupId > <artifactId > junit</artifactId > <version > ${junit.version}</version > <scope > test</scope > </dependency > </dependencies > </project >
按照上面的目录格式常见好目录结构和源码文件后,在工程的根目录 执行mvn compile 就会对工程进行编译,生成的文件存放在target目录下。第一次会下载全量依赖包,时间会比较长,第二次以后再次运行的时候就会比较快了。
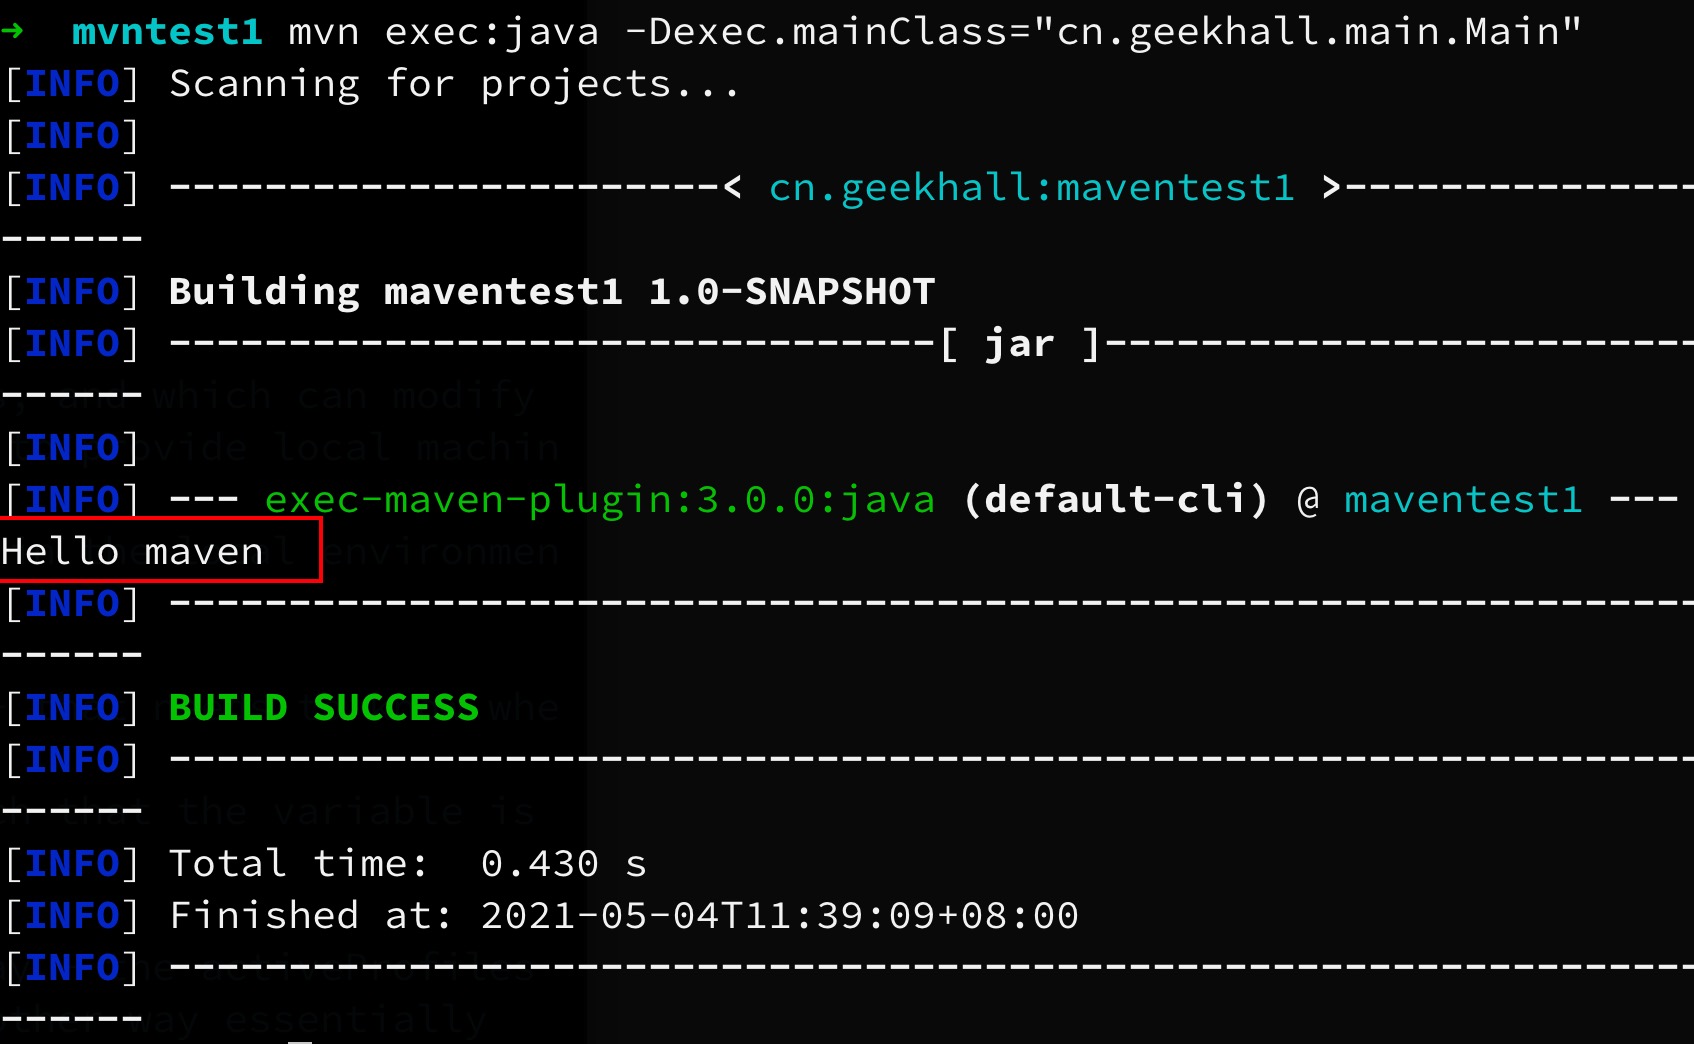
然后执行: mvn -e exec:java -Dexec.mainClass="cn.geekhall.main.Main" 即可运行工程看到执行结果。
pom.xml文件格式 maven是使用pom.xml文件来找到各种依赖包、插件的地址,解决依赖问题的。
1
2
3
4
5
6
7
8
9
10
11
12
13
14
15
16
17
18
19
20
21
22
23
24
25
26
27
28
29
30
31
32
33
34
35
36
37
38
39
40
41
42
43
44
45
46
47
48
49
50
51
52
53
54
55
56
57
58
59
60
61
62
63
64
65
66
67
68
69
70
71
72
73
74
75
76
77
78
79
80
81
82
83
84
85
86
87
88
89
90
91
92
93
94
95
96
97
98
99
100
101
102
103
104
105
106
107
108
109
110
111
112
113
114
115
116
117
118
119
120
121
122
123
124
125
<?xml version="1.0" encoding="UTF-8" ?> <project xmlns ="http://maven.apache.org/POM/4.0.0" xmlns:xsi ="http://www.w3.org/2001/XMLSchema-instance" xsi:schemaLocation ="http://maven.apache.org/POM/4.0.0 http://maven.apache.org/xsd/maven-4.0.0.xsd" > <modelVersion > 4.0.0</modelVersion > <groupId > cn.geekhall</groupId > <artifactId > maventest02</artifactId > <version > 1.0-SNAPSHOT</version > <packaging > war</packaging > <name > maventest02 Maven Webapp</name > <url > https://www.geekhall.cn</url > <properties > <project.build.sourceEncoding > UTF-8</project.build.sourceEncoding > <maven.compiler.source > 1.7</maven.compiler.source > <maven.compiler.target > 1.7</maven.compiler.target > <junit.version > 4.11</junit.version > <servlet-version > 4.0.1</servlet-version > <jsp-version > 2.3.3</jsp-version > <jstl-version > 1.2</jstl-version > <spring-version > 5.1.11.RELEASE</spring-version > <aspectjweaver-version > 1.9.4</aspectjweaver-version > <mybatis-version > 3.5.2</mybatis-version > <mybatis-spring-version > 2.0.2</mybatis-spring-version > <log4j-version > 1.2.17</log4j-version > <mysql-connector-java-version > 5.1.48</mysql-connector-java-version > <jackson-version > 2.9.9</jackson-version > <commons-fileupload-version > 1.3.1</commons-fileupload-version > </properties > <dependencies > <dependency > <groupId > junit</groupId > <artifactId > junit</artifactId > <version > ${junit.version}</version > <scope > test</scope > </dependency > <dependency > <groupId > javax.servlet</groupId > <artifactId > javax.servlet-api</artifactId > <version > ${servlet-version}</version > <scope > provided</scope > </dependency > <dependency > <groupId > javax.servlet.jsp</groupId > <artifactId > javax.servlet.jsp-api</artifactId > <version > ${jsp-version}</version > <scope > provided</scope > </dependency > <dependency > <groupId > jstl</groupId > <artifactId > jstl</artifactId > <version > ${jstl-version}</version > </dependency > </dependencies > <profiles > <profile > <id > dev</id > <properties > <env > dev</env > </properties > <acctivation > <activeByDefault > true</activeByDefault > </acctivation > </profile > </profile > <build > <finalName > maventest02</finalName > <plugins > <plugin > <groupId > org.apache.tomcat.maven</groupId > <artifactId > tomcat7-maven-plugin</artifactId > <version > 2.2</version > <configuration > <port > 6060</port > <path > /my</path > </configuration > </plugin > </plugins > <pluginManagement > <plugins > <plugin > <artifactId > maven-clean-plugin</artifactId > <version > 3.1.0</version > </plugin > <plugin > <artifactId > maven-resources-plugin</artifactId > <version > 3.0.2</version > </plugin > <plugin > <artifactId > maven-compiler-plugin</artifactId > <version > 3.8.0</version > </plugin > <plugin > <artifactId > maven-surefire-plugin</artifactId > <version > 2.22.1</version > </plugin > <plugin > <artifactId > maven-war-plugin</artifactId > <version > 3.2.2</version > </plugin > <plugin > <artifactId > maven-install-plugin</artifactId > <version > 2.5.2</version > </plugin > <plugin > <artifactId > maven-deploy-plugin</artifactId > <version > 2.8.2</version > </plugin > </plugins > </pluginManagement > </build > </project >
maven常用命令 maven命令格式为:mvn [plugin-name]:[goal-name],表示执行plugin-name插件的goal-name目标,
常用命令有:
mvn -version / mvn -v : 显示版本信息。mvn clean : 清理项目产生的临时文件,一般是模块下的target目录。mvn compile : 编译源代码,一般编译模块下的src/main/java目录。mvn package : 项目打包工具,会在模块下的target目录生成jar或者war等文件。mvn test : 测试命令,会执行src/test/java目录下的测试用例。mvn install : 将打包的jar或者war文件复制到你的本地仓库中,供其他模块使用。mvn deploy : 将打包的jar或者war文件发布到远程仓库,提供其他人员进行下载依赖。mvn site : 生成项目相关信息的网站。mvn eclipse:eclipse : 将项目转化为Eclipse项目。mvn dependency:tree : 打印出项目的整个依赖树。mvn archetype:generate : 创建maven的普通java项目。mvn tomcat7:run : 在tomcat容器中运行web应用。mvn jetty:run: 调用jetty的run目标在Jetty Servlet容器中启动web应用。
需要注意的是:运行maven命令的时候,首先需要定位在maven项目所在的目录,也就是项目pom.xml文件所在的目录。否则需要使用参数执行项目的目录。
还可以使用-D指定属性参数,例如:mvn package -Dmaven.test.skip=true 可以指定打包的时候跳过单元测试。
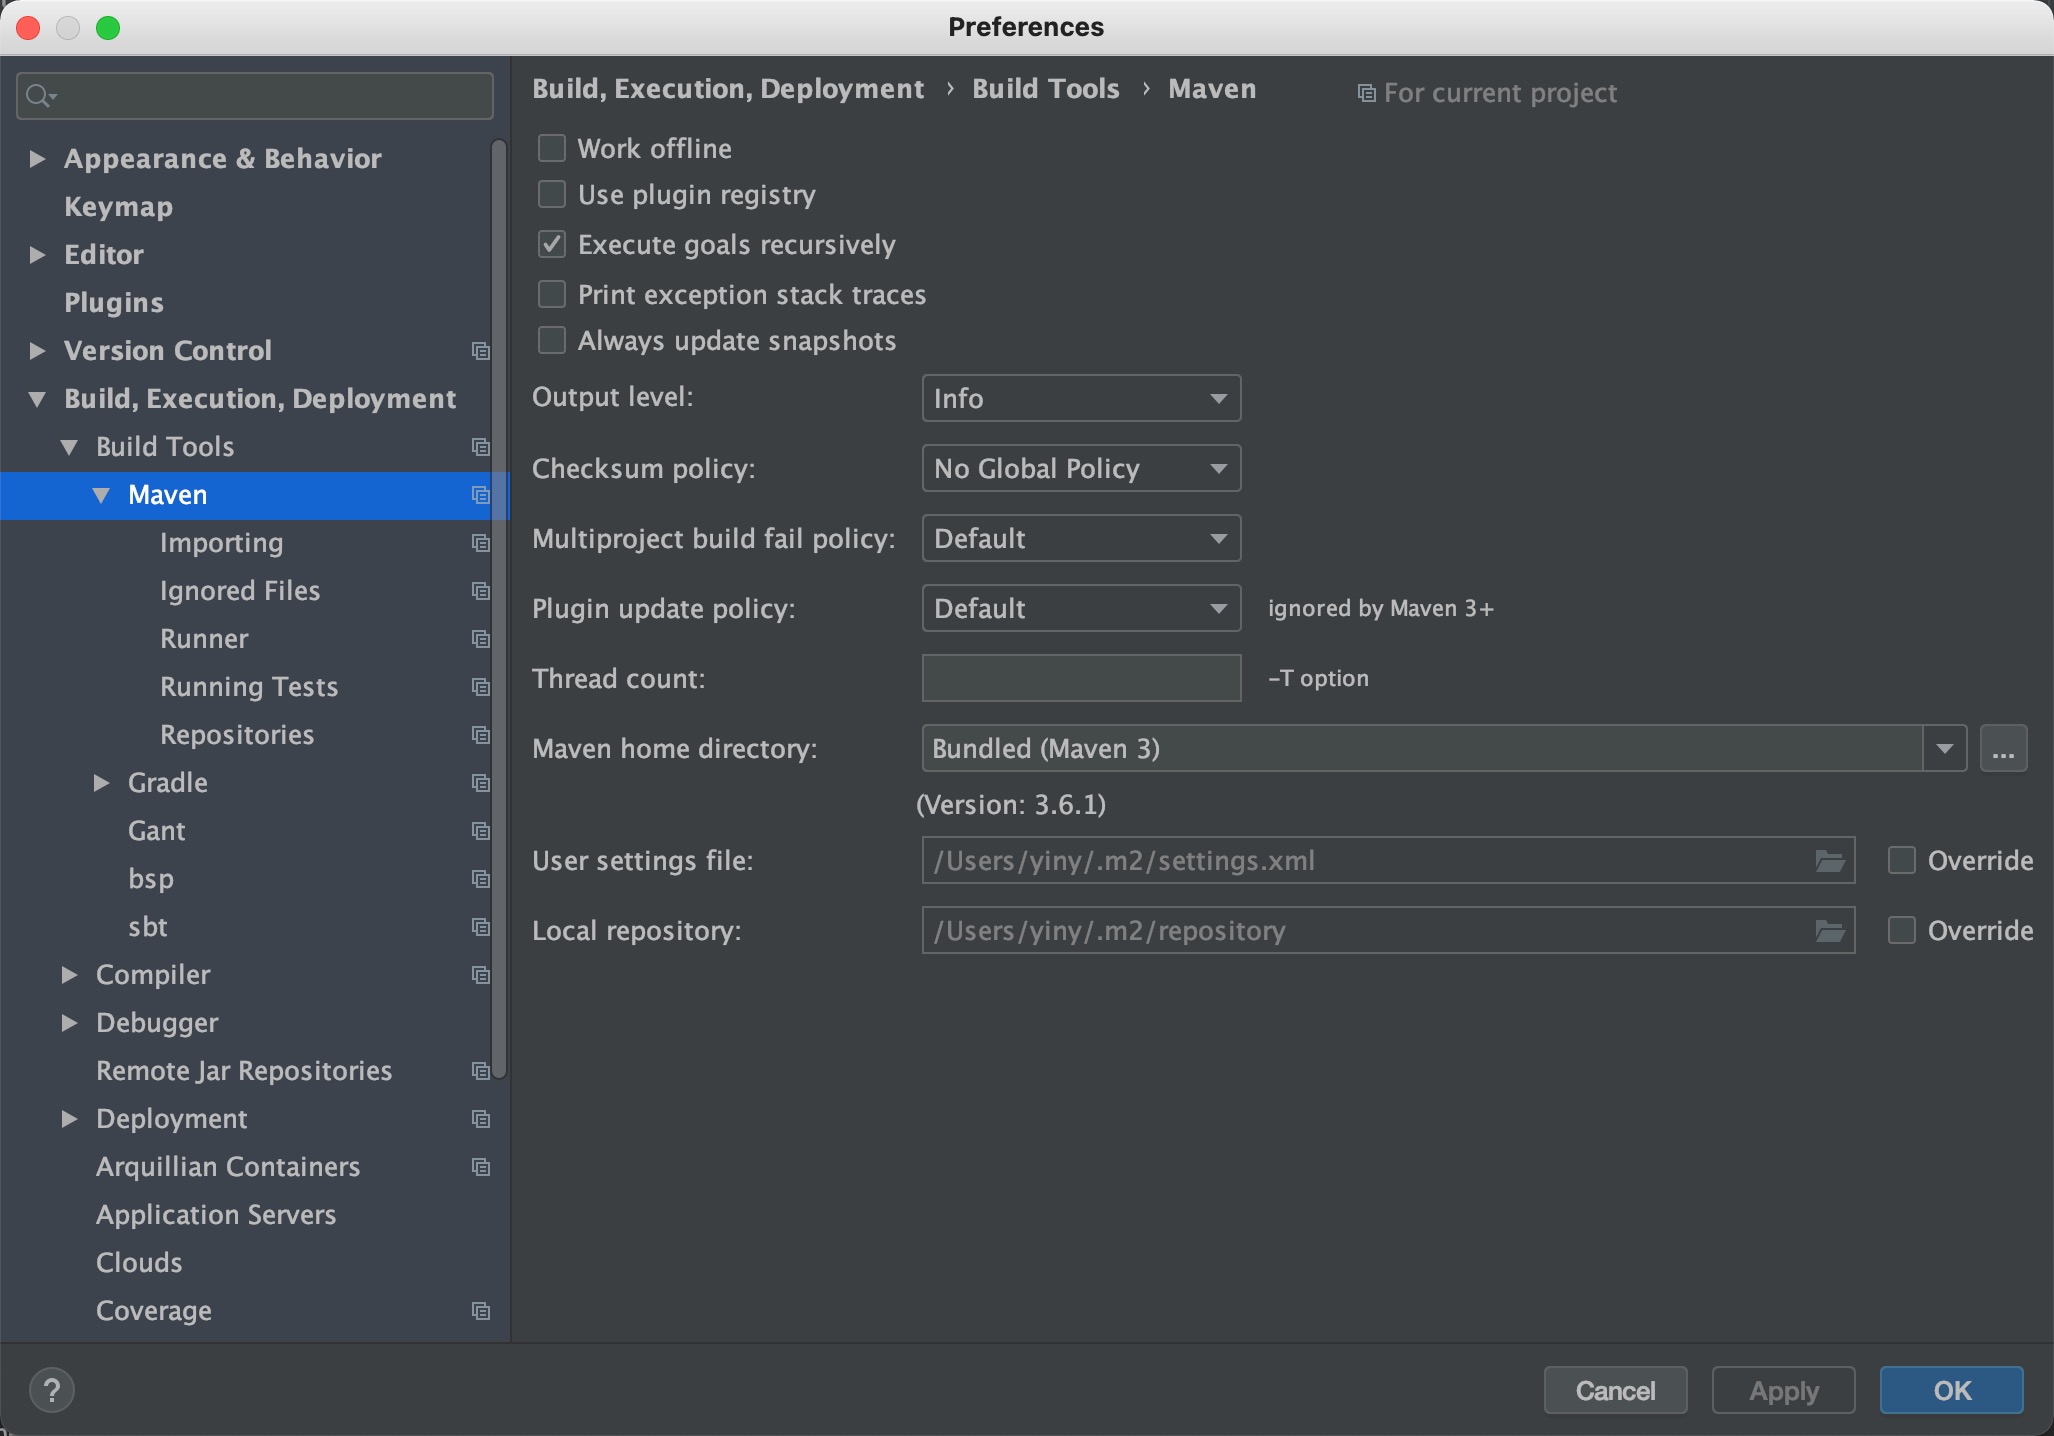
IDEA集成maven环境 在工具的 preferences -> Build,Extension,Deployment -> Build Tools ->Maven 目录下配置maven。
在Maven home directory:目录下配置当前使用的maven,这里使用了IDEA自带的maven。
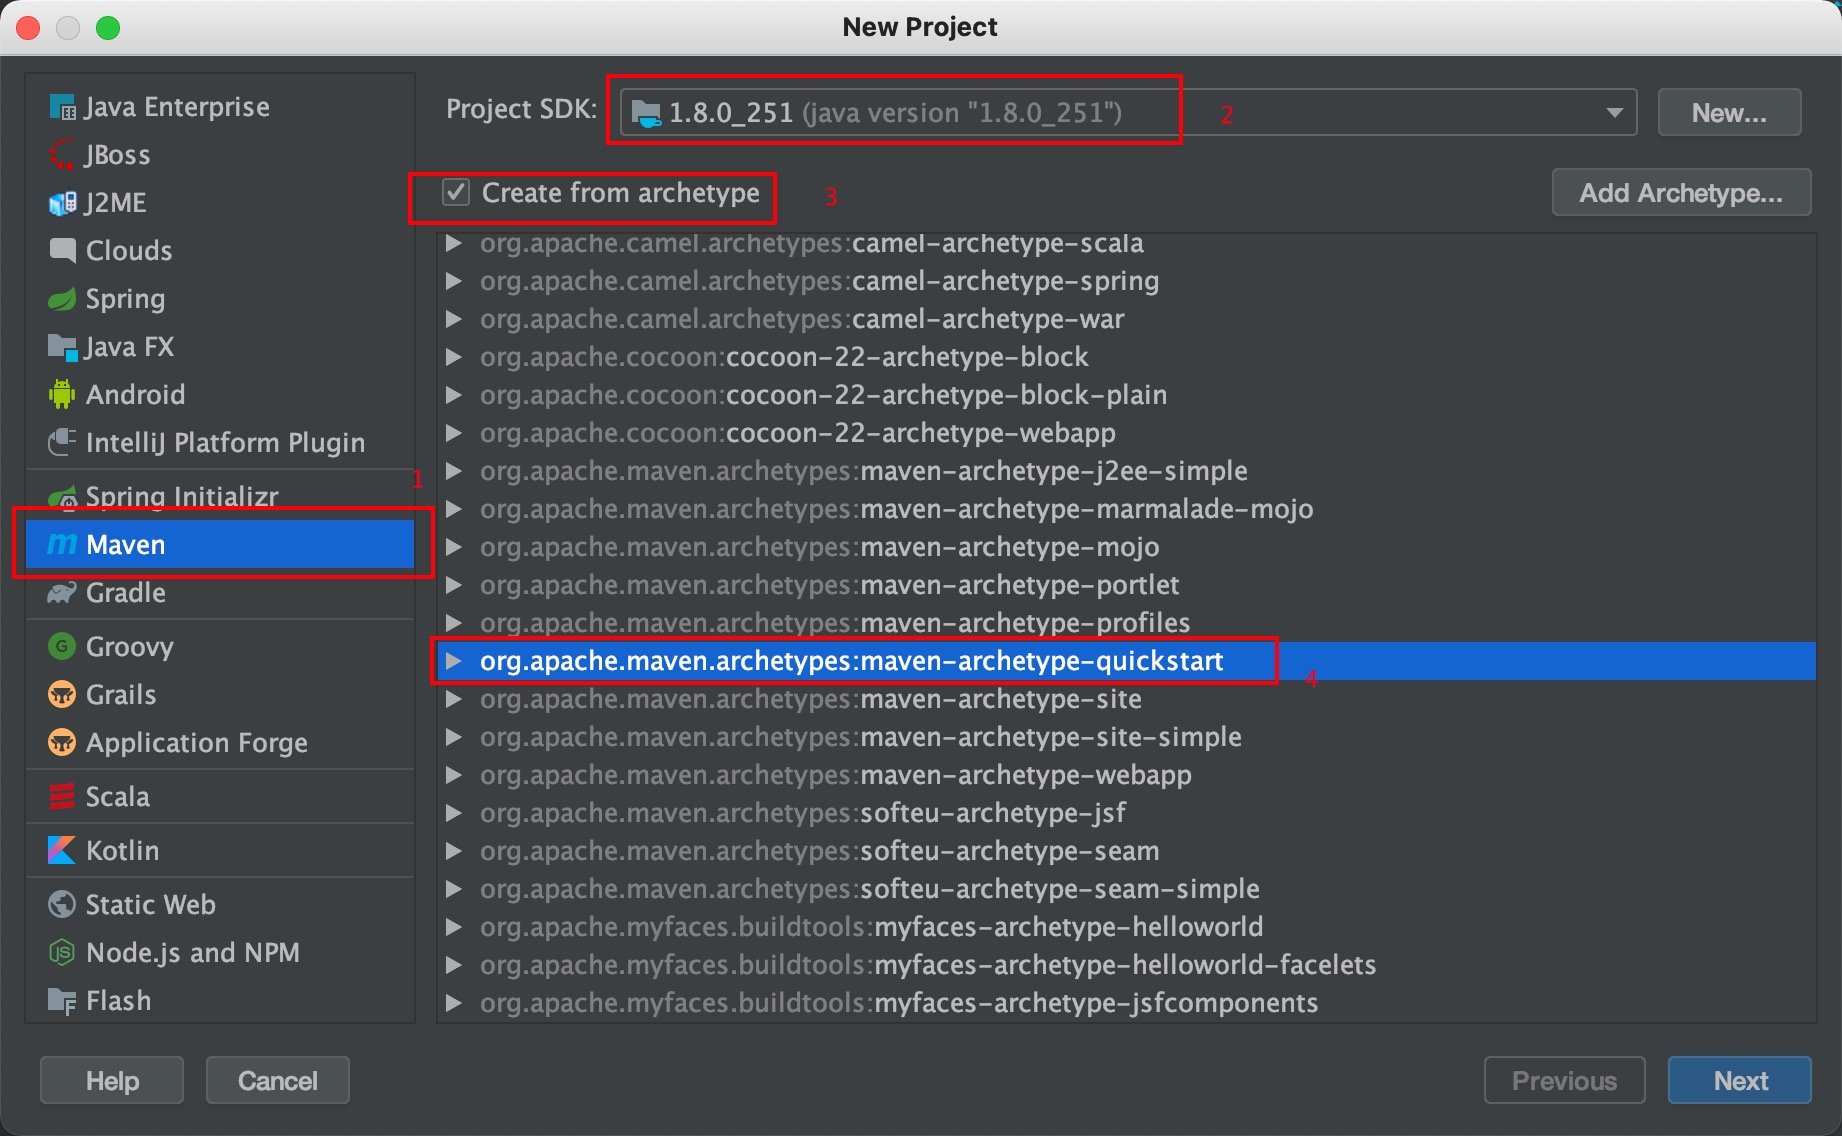
创建java项目 创建普通java项目
web项目要选择maven-archetype-webapp
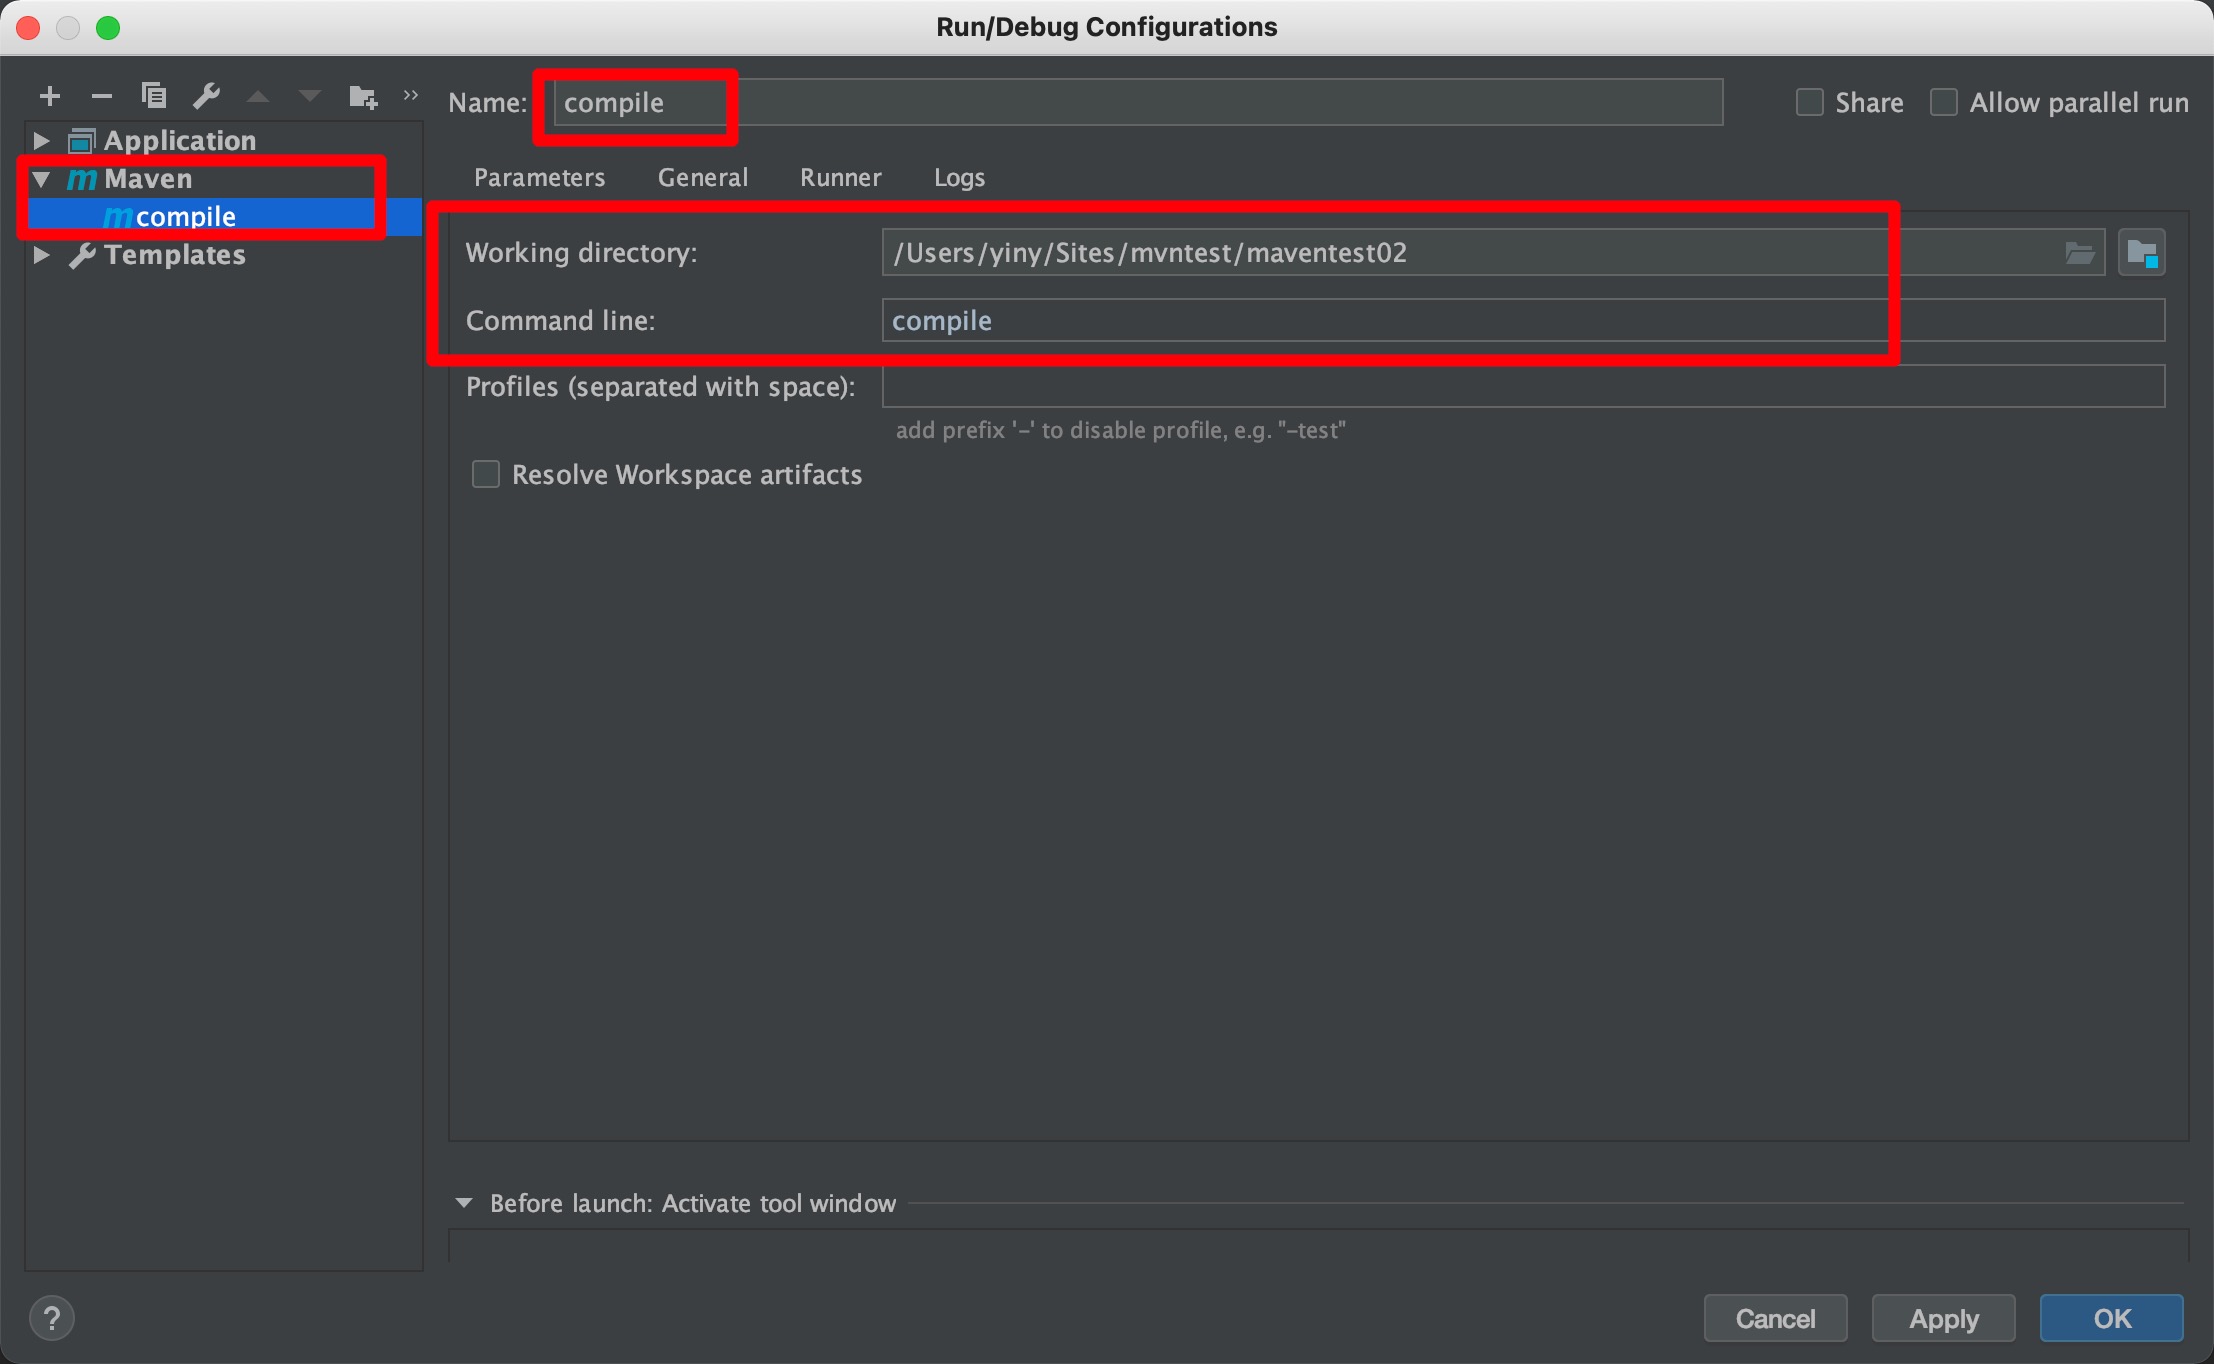
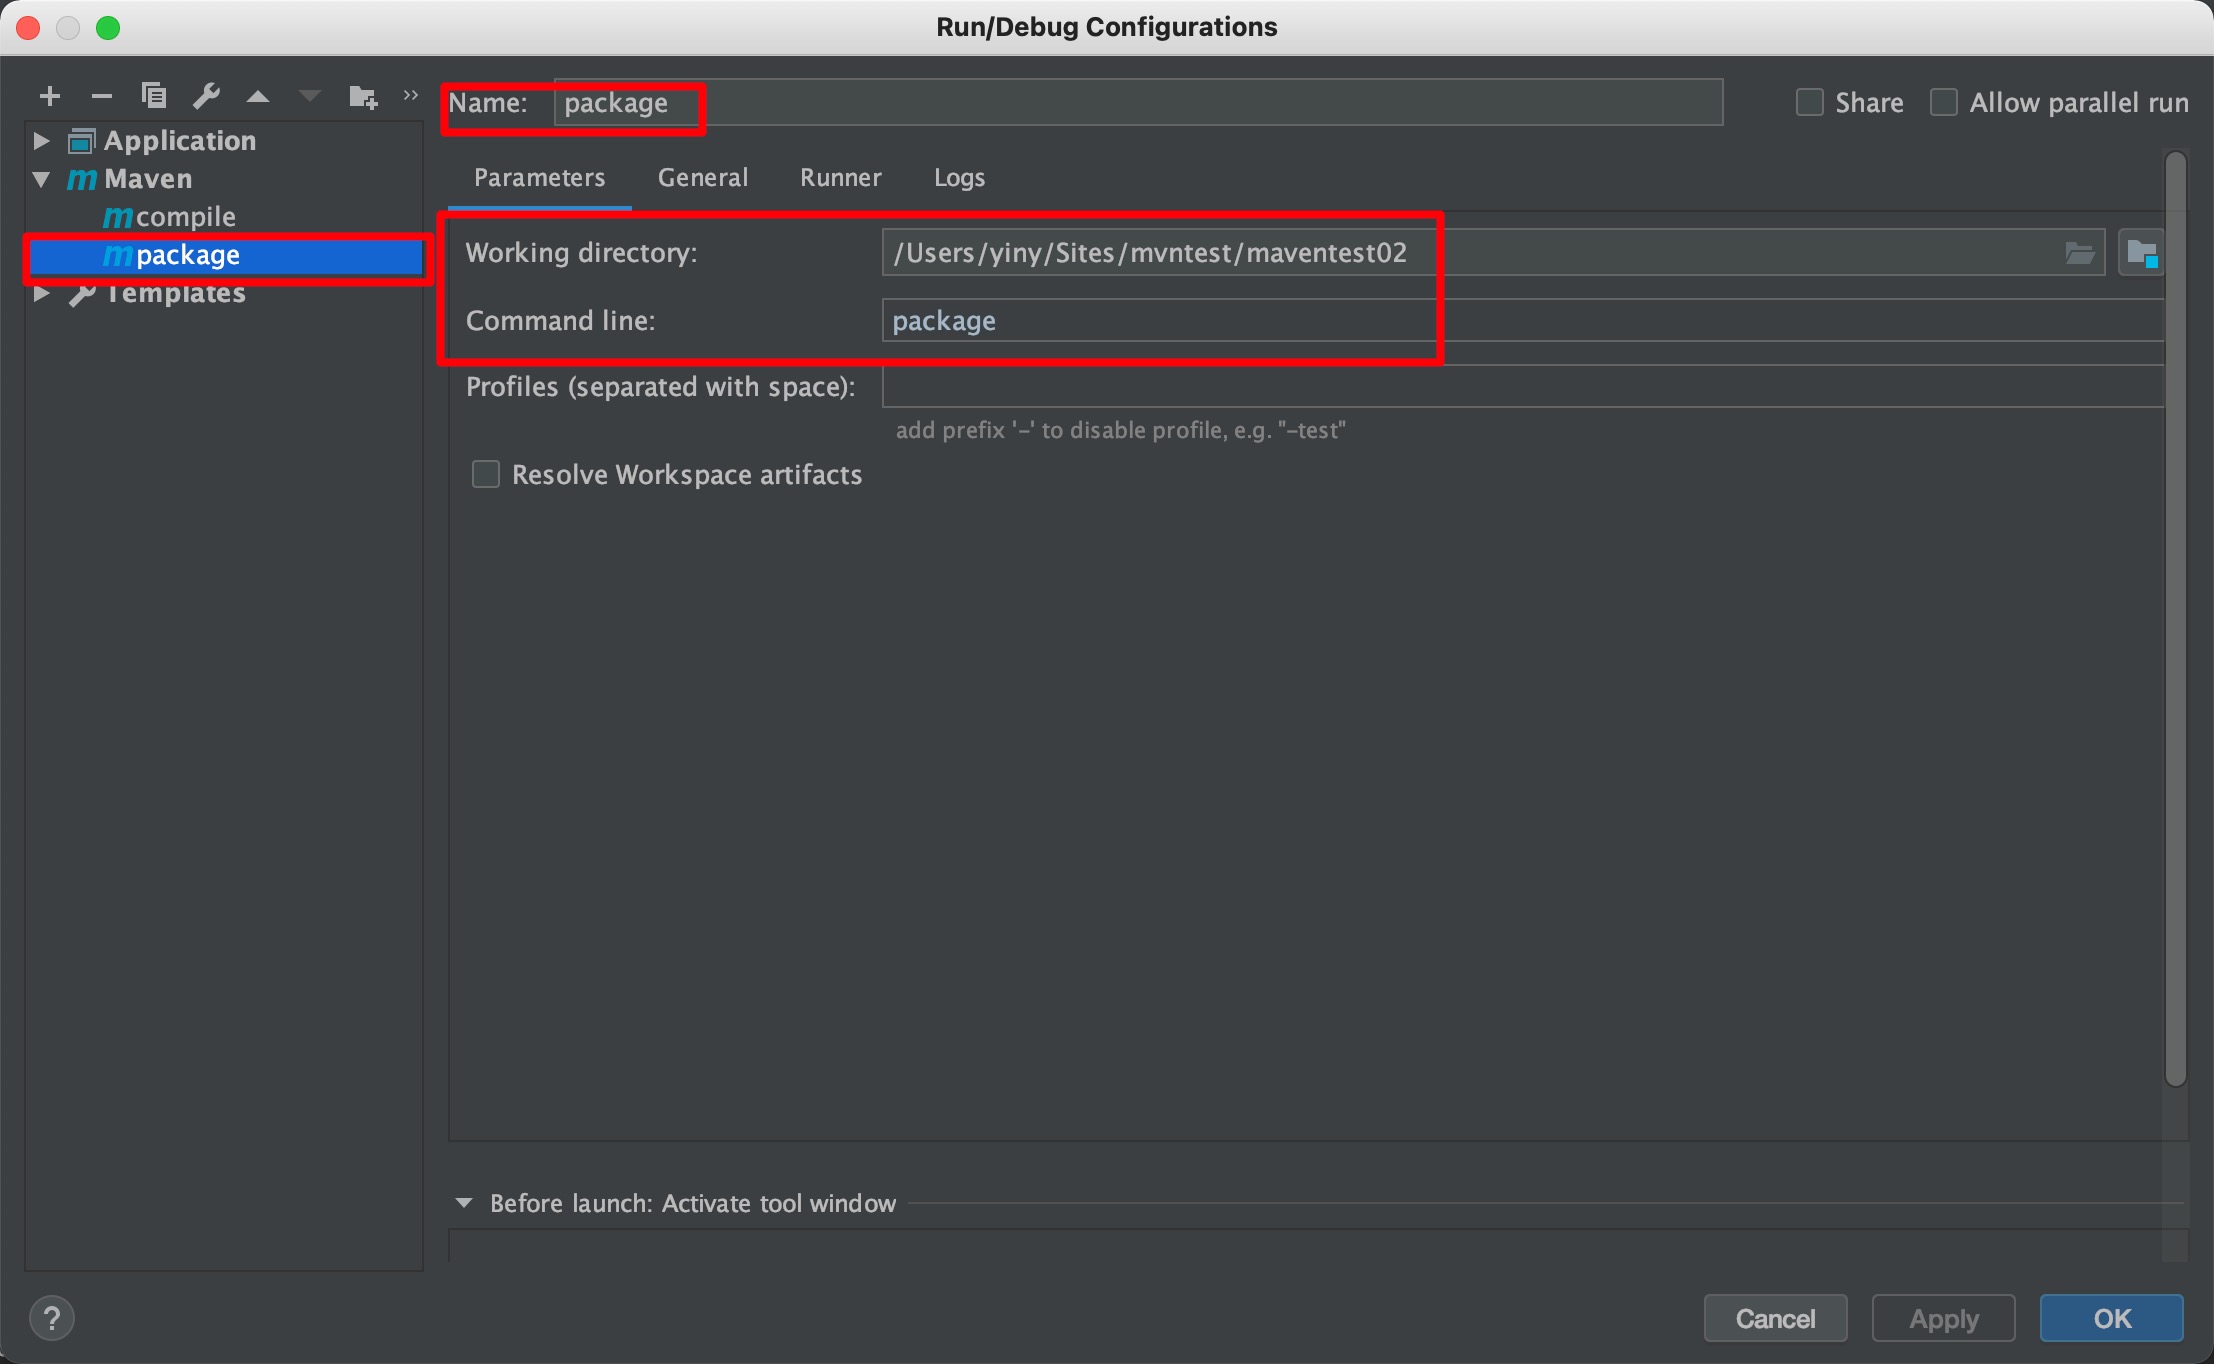
编辑运行配置 compile
package
maven仓库 对于maven来说,仓库分为两类:本地仓库和远程仓库。maven根据坐标去寻找构件的时候,它会首先查看本地仓库,若存在则直接使用,不存在再去远程仓库下载。
mavenrepository.com maven的配置可以从https://mvnrepository.com/上找到。
